Procedural Level Generation in Unity
Creating Dynamic Terrains with Voronoi Diagrams
2024-10-09
2024-10-09
While working on my Real Time Strategy Roguelike videogame with cats, I encountered the very common problem of how to procedurally generate levels. After going back and forth between Perlin and Voronoi for about a week, I landed up on an algorithm that makes it possible to generate complicated 3D levels, with a variety of structures in it, always completely walkable.
The generation process starts with the creation of a Height map.
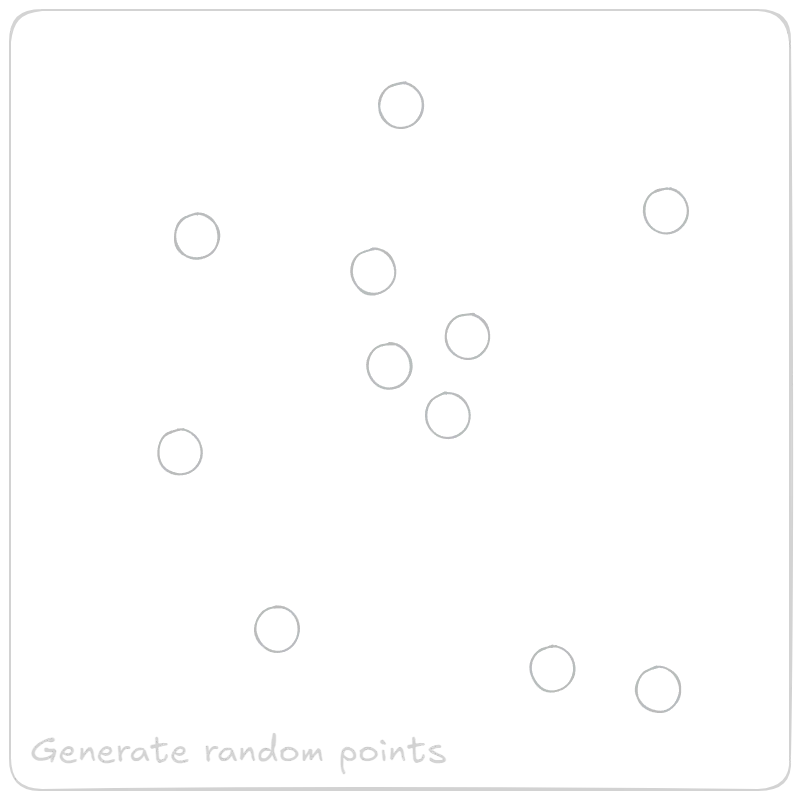
I begin by creating a grid using Voronoi diagrams.
The number of Voronoi points, minimum distance between them, and the "relaxation" (which determines how evenly spaced they are)
can all be customized.
Next, I use an algorithm to determine which Voronoi cells touch each other and create a Graph connecting these cells. I run a Depth-First Search (DFS) on this graph to create a Tree that connects all the cells randomly.
Then, I assign heights. Starting from one cell, I traverse the graph, giving each adjacent cell a height difference of -1, 0, or 1, ensuring a smooth elevation change of 1 unit at most between connected cells. Once the heights are assigned to the cells, I set the height for every individual square within each cell to match the given height.
This is how the heightmap looks like, after applying all the steps above. From now until the end of the post, I will show the Unicode map log that gets automatically created every time I generate a new map.
| 2 | 2 | 5 | 5 | 5 | 5 | 5 | 4 | 4 | 5 | 5 | 5 | 5 | 5 | 5 | 5 |
| 3 | 3 | 5 | 5 | 5 | 5 | 4 | 4 | 4 | 4 | 5 | 5 | 5 | 5 | 5 | 5 |
| 3 | 3 | 5 | 5 | 5 | 5 | 4 | 4 | 4 | 4 | 5 | 5 | 5 | 5 | 5 | 5 |
| 3 | 3 | 5 | 5 | 5 | 4 | 4 | 4 | 4 | 4 | 5 | 5 | 5 | 5 | 5 | 5 |
| 2 | 2 | 2 | 2 | 2 | 4 | 4 | 4 | 4 | 4 | 4 | 5 | 5 | 5 | 5 | 5 |
| 2 | 2 | 2 | 2 | 2 | 4 | 4 | 4 | 4 | 4 | 4 | 5 | 5 | 5 | 5 | 5 |
| 2 | 2 | 2 | 2 | 2 | 4 | 4 | 4 | 4 | 4 | 4 | 5 | 5 | 5 | 5 | 5 |
| 2 | 2 | 2 | 2 | 2 | 2 | 4 | 4 | 4 | 4 | 6 | 6 | 6 | 6 | 6 | 6 |
| 2 | 2 | 2 | 2 | 2 | 2 | 4 | 4 | 4 | 6 | 6 | 6 | 6 | 6 | 6 | 6 |
| 2 | 2 | 2 | 2 | 3 | 3 | 3 | 3 | 3 | 6 | 6 | 6 | 6 | 6 | 6 | 6 |
| 2 | 2 | 3 | 3 | 3 | 3 | 3 | 3 | 3 | 6 | 6 | 6 | 6 | 6 | 6 | 6 |
| 2 | 3 | 3 | 3 | 3 | 3 | 3 | 3 | 3 | 6 | 6 | 6 | 6 | 6 | 6 | 6 |
| 3 | 3 | 3 | 3 | 3 | 3 | 3 | 3 | 3 | 3 | 6 | 6 | 6 | 6 | 6 | 6 |
| 3 | 3 | 3 | 3 | 3 | 3 | 3 | 3 | 3 | 3 | 6 | 6 | 6 | 6 | 6 | 6 |
| 3 | 3 | 3 | 3 | 3 | 3 | 3 | 3 | 3 | 3 | 6 | 6 | 6 | 6 | 6 | 6 |
| 3 | 3 | 3 | 3 | 3 | 3 | 3 | 3 | 3 | 3 | 3 | 6 | 6 | 6 | 6 | 6 |
The final step of height map generation is another relaxation algorithm, which smooths the terrain further, but this time it operates on the individual squares, not the Voronoi cells. As you can see, the difference of values between adjacent cells has now been reduced. This step is purely optional, and cannot make the map not trasversable by units
| 2 | 3 | 4 | 5 | 5 | 5 | 4 | 4 | 4 | 4 | 5 | 5 | 5 | 5 | 5 | 5 |
| 3 | 3 | 5 | 5 | 5 | 5 | 4 | 4 | 4 | 4 | 5 | 5 | 5 | 5 | 5 | 5 |
| 3 | 3 | 5 | 5 | 5 | 5 | 4 | 4 | 4 | 4 | 5 | 5 | 5 | 5 | 5 | 5 |
| 3 | 3 | 4 | 4 | 4 | 4 | 4 | 4 | 4 | 4 | 5 | 5 | 5 | 5 | 5 | 5 |
| 2 | 2 | 3 | 3 | 3 | 4 | 4 | 4 | 4 | 4 | 4 | 5 | 5 | 5 | 5 | 5 |
| 2 | 2 | 2 | 2 | 2 | 4 | 4 | 4 | 4 | 4 | 4 | 5 | 5 | 5 | 5 | 5 |
| 2 | 2 | 2 | 2 | 2 | 3 | 4 | 4 | 4 | 4 | 5 | 5 | 5 | 5 | 5 | 5 |
| 2 | 2 | 2 | 2 | 2 | 3 | 4 | 4 | 4 | 5 | 5 | 6 | 6 | 6 | 6 | 6 |
| 2 | 2 | 2 | 2 | 2 | 3 | 3 | 4 | 4 | 5 | 6 | 6 | 6 | 6 | 6 | 6 |
| 2 | 2 | 2 | 2 | 3 | 3 | 3 | 3 | 4 | 5 | 6 | 6 | 6 | 6 | 6 | 6 |
| 2 | 2 | 3 | 3 | 3 | 3 | 3 | 3 | 4 | 5 | 6 | 6 | 6 | 6 | 6 | 6 |
| 2 | 3 | 3 | 3 | 3 | 3 | 3 | 3 | 4 | 5 | 6 | 6 | 6 | 6 | 6 | 6 |
| 3 | 3 | 3 | 3 | 3 | 3 | 3 | 3 | 3 | 4 | 5 | 6 | 6 | 6 | 6 | 6 |
| 3 | 3 | 3 | 3 | 3 | 3 | 3 | 3 | 3 | 4 | 5 | 6 | 6 | 6 | 6 | 6 |
| 3 | 3 | 3 | 3 | 3 | 3 | 3 | 3 | 3 | 4 | 5 | 6 | 6 | 6 | 6 | 6 |
| 3 | 3 | 3 | 3 | 3 | 3 | 3 | 3 | 3 | 3 | 4 | 5 | 6 | 6 | 6 | 6 |
The base grid is the intermediate step between the height map and the final grid. Its purpose is to divide the terrain into four types: terrain, empty, ramps, and structures.
The first step is converting the height map into a 3D grid, which consists of only two values: empty and terrain. Next, ramps are added wherever necessary to make the map navigable. Finally, ramps are gradually removed in two stages.
In the first stage, I identify the terrain patches and count the number of connections (ramps) between patches with different elevations. I reduce the connections, keeping only a percentage of them. In the second stage, I remove any ramps that touch each other, even diagonally.
| ■ | ■ | ■ | ■ | ■ | ■ | ■ | ■ | ■ | ■ | ■ | ■ | ■ | ■ | ■ | ■ |
| ■ | ■ | ■ | ■ | ■ | ■ | ■ | ■ | ■ | ■ | ■ | ■ | ■ | ■ | ■ | ■ |
| ■ | ■ | ■ | ■ | ■ | ■ | ■ | ■ | ■ | ■ | ■ | ■ | ■ | ■ | ■ | ■ |
| ■ | ■ | ■ | ■ | ■ | ■ | ■ | ■ | ■ | ■ | ■ | ■ | ■ | ■ | ■ | ■ |
| ■ | ■ | ■ | ■ | ■ | ■ | ■ | ■ | ■ | ■ | ■ | ■ | ■ | ■ | ■ | ■ |
| ■ | ■ | ■ | ■ | ■ | ■ | ■ | ■ | ■ | ■ | ■ | ■ | ■ | ■ | ■ | ■ |
| ■ | ■ | ■ | ■ | ■ | ■ | ■ | ■ | ■ | ■ | ■ | ■ | ■ | ■ | ■ | ■ |
| ■ | ■ | ■ | ■ | ■ | ■ | ■ | ■ | ■ | ■ | ■ | ■ | ■ | ■ | ■ | ■ |
| ■ | ■ | ■ | ■ | ■ | ■ | ■ | ■ | ■ | ■ | ■ | ■ | ■ | ■ | ■ | ■ |
| ■ | ■ | ■ | ■ | ■ | ■ | ■ | ■ | ■ | ■ | ■ | ■ | ■ | ■ | ■ | ■ |
| ■ | ■ | ■ | ■ | ■ | ■ | ■ | ■ | ■ | ■ | ■ | ■ | ■ | ■ | ■ | ■ |
| ■ | ■ | ■ | ■ | ■ | ■ | ■ | ■ | ■ | ■ | ■ | ■ | ■ | ■ | ■ | ■ |
| ■ | ■ | ■ | ■ | ■ | ■ | ■ | ■ | ■ | ■ | ■ | ■ | ■ | ■ | ■ | ■ |
| ■ | ■ | ■ | ■ | ■ | ■ | ■ | ■ | ■ | ■ | ■ | ■ | ■ | ■ | ■ | ■ |
| ■ | ■ | ■ | ■ | ■ | ■ | ■ | ■ | ■ | ■ | ■ | ■ | ■ | ■ | ■ | ■ |
| ■ | ■ | ■ | ■ | ■ | ■ | ■ | ■ | ■ | ■ | ■ | ■ | ■ | ■ | ■ | ■ |
After setting up the base grid, ramps are added between different elevations to ensure the map is navigable. Once the ramps are in place, I begin the process of removing ramps to optimize the terrain.
In the first pass, I reduce the number of ramps between patches with different heights, leaving only a percentage of the original connections. In the second pass, I remove any ramps that are touching, even diagonally, to further refine the level design.
| ■ | ■ | ■ | ■ | ■ | ■ | ■ | ■ | ■ | ■ | ■ | ■ | ■ | ■ | ■ | ■ |
| ■ | ■ | ■ | ■ | ■ | ↑ | ■ | ■ | ■ | ■ | ↑ | ■ | ■ | ■ | ■ | ■ |
| ■ | ■ | ■ | ↑ | ↑ | ↑ | ■ | ■ | ■ | ■ | ↑ | ■ | ■ | ■ | ■ | ■ |
| ■ | ↑ | ■ | ↑ | ↑ | ■ | ■ | ■ | ■ | ■ | ↑ | ■ | ■ | ■ | ■ | ■ |
| ■ | ■ | ↑ | ↑ | ↑ | ■ | ■ | ■ | ■ | ■ | ■ | ↑ | ■ | ■ | ■ | ■ |
| ■ | ■ | ■ | ■ | ■ | ■ | ■ | ■ | ■ | ■ | ■ | ↑ | ■ | ■ | ■ | ■ |
| ■ | ■ | ■ | ■ | ■ | ↑ | ↑ | ■ | ■ | ■ | ↑ | ■ | ■ | ■ | ■ | ■ |
| ■ | ■ | ■ | ■ | ■ | ↑ | ↑ | ■ | ■ | ↑ | ■ | ↑ | ↑ | ↑ | ↑ | ■ |
| ■ | ■ | ■ | ■ | ■ | ↑ | ■ | ↑ | ■ | ↑ | ↑ | ■ | ■ | ■ | ■ | ■ |
| ■ | ■ | ■ | ■ | ↑ | ■ | ■ | ■ | ↑ | ↑ | ↑ | ■ | ■ | ■ | ■ | ■ |
| ■ | ■ | ↑ | ↑ | ■ | ■ | ■ | ■ | ↑ | ↑ | ↑ | ■ | ■ | ■ | ■ | ■ |
| ■ | ↑ | ■ | ■ | ■ | ■ | ■ | ■ | ↑ | ■ | ■ | ■ | ■ | ■ | ■ | ■ |
| ■ | ■ | ■ | ■ | ■ | ■ | ■ | ■ | ■ | ↑ | ↑ | ↑ | ■ | ■ | ■ | ■ |
| ■ | ■ | ■ | ■ | ■ | ■ | ■ | ■ | ■ | ↑ | ↑ | ↑ | ■ | ■ | ■ | ■ |
| ■ | ■ | ■ | ■ | ■ | ■ | ■ | ■ | ■ | ↑ | ■ | ■ | ■ | ■ | ■ | ■ |
| ■ | ■ | ■ | ■ | ■ | ■ | ■ | ■ | ■ | ■ | ■ | ■ | ■ | ■ | ■ | ■ |
After all the ramps have been added, 2 algorithms are used to remove the extra ramps.
The first one uses a Breadth-First Search in order to find out how many points of connection there are between different patches of terrain. It then removes a percentage of them, while still making sure that the map is still walkable
The second one, instead, examines the whole grid, and removes any ramp that is adjacent to another ramp. This way, the terrain is more difficult to traverse, and the map looks nicer.
| ■ | ■ | ■ | ■ | ■ | ■ | ■ | ■ | ■ | ■ | ■ | ■ | ■ | ■ | ■ | ■ |
| ■ | ■ | ■ | ■ | ■ | ↑ | ■ | ■ | ■ | ■ | ■ | ■ | ■ | ■ | ■ | ■ |
| ■ | ■ | ■ | ↑ | ↑ | ↑ | ■ | ■ | ■ | ■ | ■ | ■ | ■ | ■ | ■ | ■ |
| ■ | ↑ | ■ | ↑ | ↑ | ■ | ■ | ■ | ■ | ■ | ↑ | ■ | ■ | ■ | ■ | ■ |
| ■ | ■ | ↑ | ↑ | ■ | ■ | ■ | ■ | ■ | ■ | ■ | ■ | ■ | ■ | ■ | ■ |
| ■ | ■ | ■ | ■ | ■ | ■ | ■ | ■ | ■ | ■ | ■ | ■ | ■ | ■ | ■ | ■ |
| ■ | ■ | ■ | ■ | ■ | ■ | ↑ | ■ | ■ | ■ | ■ | ■ | ■ | ■ | ■ | ■ |
| ■ | ■ | ■ | ■ | ■ | ■ | ■ | ■ | ■ | ■ | ■ | ■ | ■ | ↑ | ■ | ■ |
| ■ | ■ | ■ | ■ | ■ | ■ | ■ | ■ | ■ | ↑ | ↑ | ■ | ■ | ■ | ■ | ■ |
| ■ | ■ | ■ | ■ | ↑ | ■ | ■ | ■ | ↑ | ↑ | ↑ | ■ | ■ | ■ | ■ | ■ |
| ■ | ■ | ↑ | ■ | ■ | ■ | ■ | ■ | ↑ | ↑ | ↑ | ■ | ■ | ■ | ■ | ■ |
| ■ | ■ | ■ | ■ | ■ | ■ | ■ | ■ | ■ | ■ | ■ | ■ | ■ | ■ | ■ | ■ |
| ■ | ■ | ■ | ■ | ■ | ■ | ■ | ■ | ■ | ■ | ↑ | ↑ | ■ | ■ | ■ | ■ |
| ■ | ■ | ■ | ■ | ■ | ■ | ■ | ■ | ■ | ↑ | ↑ | ↑ | ■ | ■ | ■ | ■ |
| ■ | ■ | ■ | ■ | ■ | ■ | ■ | ■ | ■ | ↑ | ■ | ■ | ■ | ■ | ■ | ■ |
| ■ | ■ | ■ | ■ | ■ | ■ | ■ | ■ | ■ | ■ | ■ | ■ | ■ | ■ | ■ | ■ |
| ■ | ■ | ■ | ■ | ■ | ■ | ■ | ■ | ■ | ■ | ■ | ■ | ■ | ■ | ■ | ■ |
| ■ | ■ | ■ | ■ | ■ | ■ | ■ | ■ | ■ | ■ | ■ | ■ | ■ | ■ | ■ | ■ |
| ■ | ■ | ■ | ↑ | ■ | ↑ | ■ | ■ | ■ | ■ | ■ | ■ | ■ | ■ | ■ | ■ |
| ■ | ↑ | ■ | ■ | ■ | ■ | ■ | ■ | ■ | ■ | ↑ | ■ | ■ | ■ | ■ | ■ |
| ■ | ■ | ■ | ↑ | ■ | ■ | ■ | ■ | ■ | ■ | ■ | ■ | ■ | ■ | ■ | ■ |
| ■ | ■ | ■ | ■ | ■ | ■ | ■ | ■ | ■ | ■ | ■ | ■ | ■ | ■ | ■ | ■ |
| ■ | ■ | ■ | ■ | ■ | ■ | ↑ | ■ | ■ | ■ | ■ | ■ | ■ | ■ | ■ | ■ |
| ■ | ■ | ■ | ■ | ■ | ■ | ■ | ■ | ■ | ■ | ■ | ■ | ■ | ↑ | ■ | ■ |
| ■ | ■ | ■ | ■ | ■ | ■ | ■ | ■ | ■ | ■ | ↑ | ■ | ■ | ■ | ■ | ■ |
| ■ | ■ | ■ | ■ | ↑ | ■ | ■ | ■ | ■ | ■ | ■ | ■ | ■ | ■ | ■ | ■ |
| ■ | ■ | ↑ | ■ | ■ | ■ | ■ | ■ | ↑ | ■ | ↑ | ■ | ■ | ■ | ■ | ■ |
| ■ | ■ | ■ | ■ | ■ | ■ | ■ | ■ | ■ | ■ | ■ | ■ | ■ | ■ | ■ | ■ |
| ■ | ■ | ■ | ■ | ■ | ■ | ■ | ■ | ■ | ■ | ■ | ↑ | ■ | ■ | ■ | ■ |
| ■ | ■ | ■ | ■ | ■ | ■ | ■ | ■ | ■ | ■ | ■ | ■ | ■ | ■ | ■ | ■ |
| ■ | ■ | ■ | ■ | ■ | ■ | ■ | ■ | ■ | ↑ | ■ | ■ | ■ | ■ | ■ | ■ |
| ■ | ■ | ■ | ■ | ■ | ■ | ■ | ■ | ■ | ■ | ■ | ■ | ■ | ■ | ■ | ■ |
Once the terrain and ramps are set, I begin adding structures to the map. I scan the entire map looking for squares of various sizes, ranging from 1x1 to 6x6, and mark them as structures. At this stage, I haven't yet decided exactly what these structures will be, but they could include buildings, statues, altars, enemy camps, trees, or objectives. This step basically fills the map with potential points of interest and/or decorations.
| ■ | ■ | ■ | ■ | ■ | ■ | ■ | ■ | ■ | ■ | ■ | ■ | ■ | ■ | ■ | ■ |
| ■ | ■ | ■ | ■ | ■ | ■ | ■ | ■ | ■ | ■ | ■ | ▣ | ■ | ▣ | ■ | ■ |
| ■ | ■ | ■ | ↑ | ■ | ↑ | ■ | ▣ | ▣ | ■ | ■ | ■ | ■ | ■ | ■ | ■ |
| ■ | ↑ | ■ | ■ | ■ | ■ | ■ | ▣ | ▣ | ■ | ↑ | ■ | ■ | ▣ | ■ | ■ |
| ■ | ■ | ■ | ↑ | ■ | ■ | ■ | ■ | ■ | ■ | ■ | ■ | ■ | ■ | ■ | ■ |
| ■ | ■ | ■ | ■ | ■ | ■ | ■ | ■ | ▣ | ■ | ■ | ■ | ▣ | ■ | ▣ | ■ |
| ■ | ▣ | ■ | ■ | ■ | ■ | ↑ | ■ | ■ | ■ | ■ | ■ | ■ | ■ | ■ | ■ |
| ■ | ■ | ■ | ▣ | ■ | ■ | ■ | ■ | ■ | ■ | ■ | ■ | ■ | ↑ | ■ | ■ |
| ■ | ▣ | ■ | ■ | ■ | ■ | ■ | ■ | ■ | ■ | ↑ | ■ | ■ | ■ | ■ | ■ |
| ■ | ■ | ■ | ■ | ↑ | ■ | ■ | ■ | ■ | ■ | ■ | ■ | ▣ | ■ | ■ | ■ |
| ■ | ■ | ↑ | ■ | ■ | ■ | ■ | ■ | ↑ | ■ | ↑ | ■ | ■ | ■ | ▣ | ■ |
| ■ | ■ | ■ | ■ | ■ | ■ | ▣ | ■ | ■ | ■ | ■ | ■ | ■ | ■ | ■ | ■ |
| ■ | ■ | ■ | ■ | ▣ | ■ | ■ | ■ | ■ | ■ | ■ | ↑ | ■ | ▣ | ■ | ■ |
| ■ | ▣ | ▣ | ■ | ■ | ■ | ■ | ■ | ■ | ■ | ■ | ■ | ■ | ■ | ■ | ■ |
| ■ | ▣ | ▣ | ■ | ■ | ▣ | ■ | ▣ | ■ | ↑ | ■ | ■ | ■ | ■ | ▣ | ■ |
| ■ | ■ | ■ | ■ | ■ | ■ | ■ | ■ | ■ | ■ | ■ | ■ | ■ | ■ | ■ | ■ |
The final step is deciding which prefabs to use for each tile. This part is fairly straightforward: for each tile, I check its surrounding tiles to determine its type (terrain, ramp) and direction. Essentially, this is a large switch statement that ensures the correct prefab and orientation is applied to each tile based on its neighbors.
| ◢ | ◢ | ◢ | ◢ | ■ | ◣ | ■ | ■ | ■ | ■ | ◢ | ■ | ■ | ■ | ■ | ◣ |
| ◢ | ■ | ◢ | ■ | ■ | ◤ | ■ | ■ | ■ | ■ | ■ | ▣ | ■ | ▣ | ■ | ■ |
| ■ | ■ | ▼ | ↓ | ▼ | → | ■ | ▣ | ▣ | ■ | ◥ | ■ | ■ | ■ | ■ | ■ |
| ▼ | ↓ | ◥ | ■ | ■ | ■ | ■ | ▣ | ▣ | ■ | ↓ | ■ | ■ | ▣ | ■ | ■ |
| ■ | ■ | ▼ | ↓ | ◥ | ■ | ■ | ■ | ■ | ■ | ■ | ■ | ■ | ■ | ■ | ■ |
| ■ | ■ | ■ | ■ | ■ | ◥ | ■ | ■ | ▣ | ■ | ■ | ■ | ▣ | ■ | ▣ | ■ |
| ■ | ▣ | ■ | ■ | ■ | ■ | ← | ■ | ■ | ■ | ◢ | ■ | ■ | ■ | ■ | ■ |
| ■ | ■ | ■ | ▣ | ■ | ■ | ◀ | ■ | ■ | ◢ | ■ | ◢ | ◣ | ↑ | ◢ | ◣ |
| ■ | ▣ | ■ | ■ | ■ | ■ | ■ | ◥ | ■ | ■ | ← | ■ | ■ | ■ | ■ | ■ |
| ■ | ■ | ■ | ■ | ← | ■ | ■ | ■ | ◥ | ■ | ◀ | ■ | ▣ | ■ | ■ | ■ |
| ■ | ■ | ← | ◢ | ■ | ■ | ■ | ■ | ← | ■ | ← | ■ | ■ | ■ | ▣ | ■ |
| ■ | ◢ | ■ | ■ | ■ | ■ | ▣ | ■ | ◀ | ◥ | ◀ | ■ | ■ | ■ | ■ | ■ |
| ◢ | ■ | ■ | ■ | ▣ | ■ | ■ | ■ | ■ | ■ | ■ | ← | ■ | ▣ | ■ | ■ |
| ■ | ▣ | ▣ | ■ | ■ | ■ | ■ | ■ | ■ | ◥ | ■ | ◢ | ■ | ■ | ■ | ■ |
| ■ | ▣ | ▣ | ■ | ■ | ▣ | ■ | ▣ | ■ | ↓ | ◥ | ◥ | ■ | ■ | ▣ | ■ |
| ◥ | ■ | ■ | ■ | ■ | ■ | ■ | ■ | ■ | ■ | ◥ | ◥ | ◥ | ■ | ■ | ◤ |
Working through this method of procedural generation has given me a solid way to create dynamic, navigable 3D terrains in Unity. By starting with Voronoi-based height maps and then carefully placing ramps and structures, I can ensure that each level not only functions well but also looks great. The great thing about this algorithm is that it enables for the creation of really different maps, that are always walkable. So I can simply adjust the parameters to achieve whatever kind of map I want.
And that's all for today, I hope you enjoyed the explanation. If you want to see more, check out my other blog posts!.